
You Will Need:
- Clear nail polish
- Curly ribbon (see my previous post on how to make this ribbon)
- Barrets, clip, or whatever you prefer your bows to be attached to
- Ribbon
- A hot glue gun or needle and thread
- Any additional garnishing that you would like to add to your bows
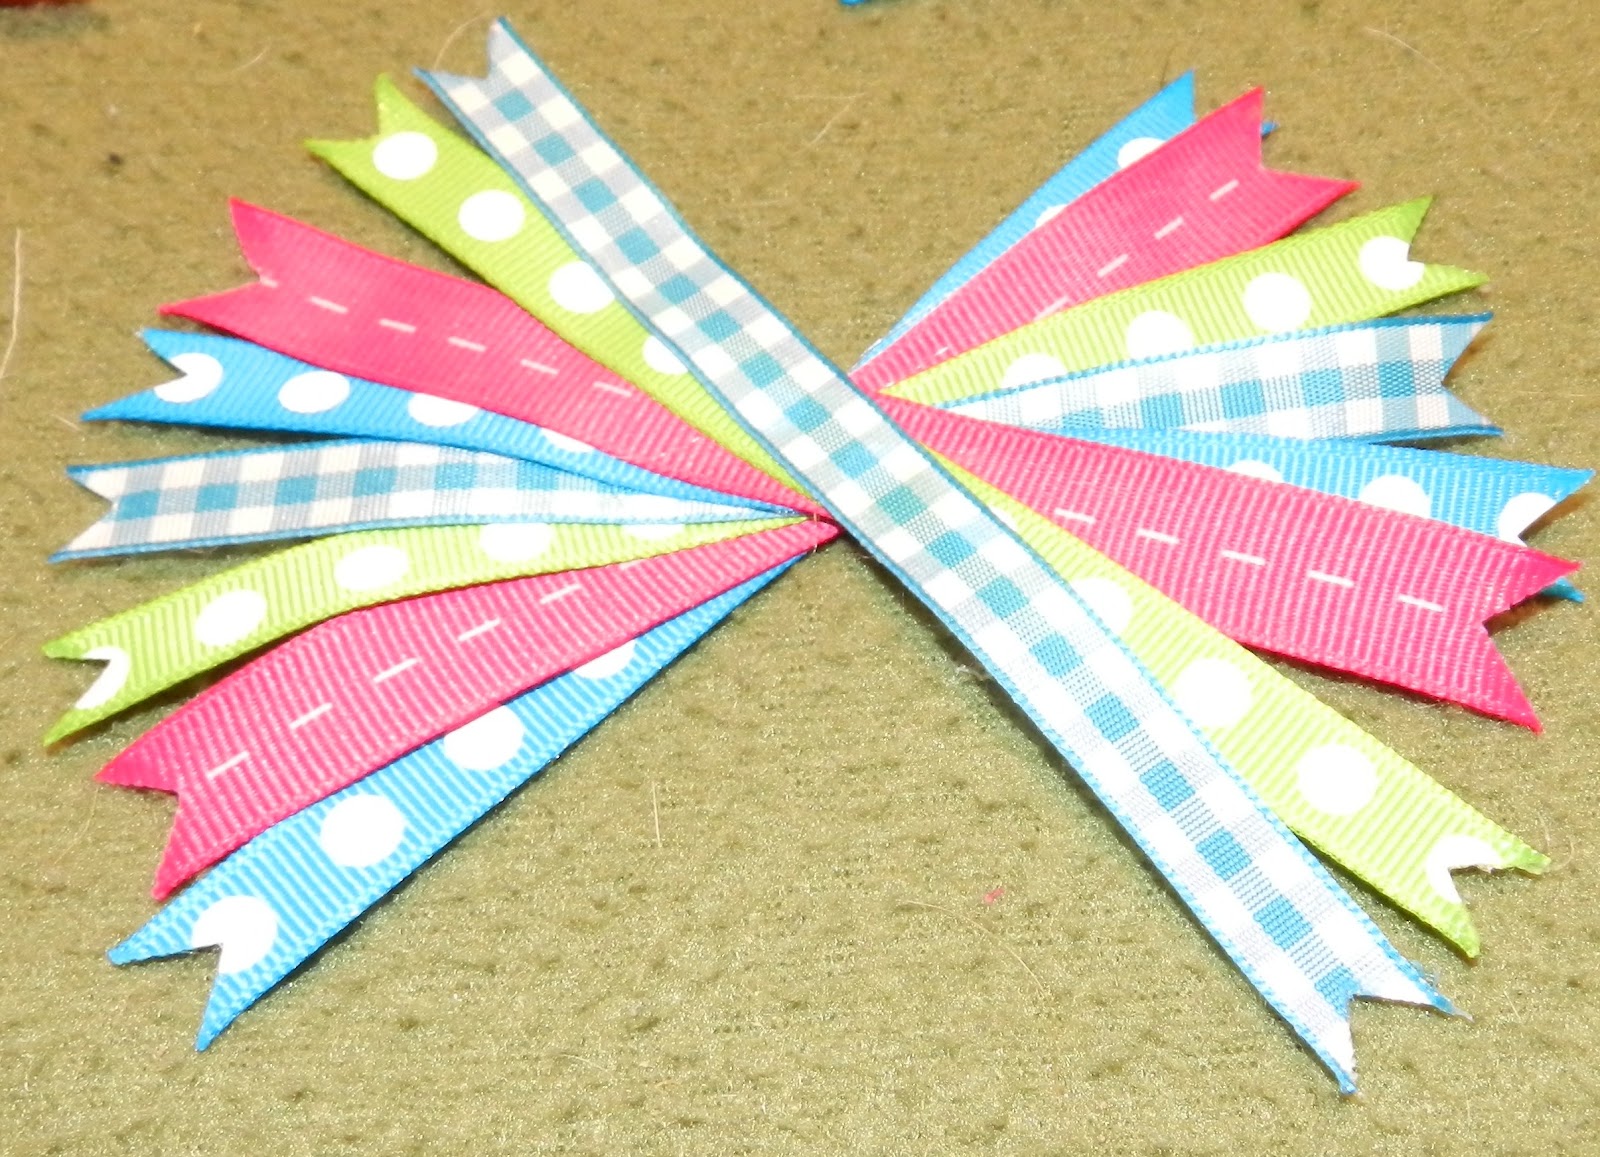
Cut strips of the non-curly ribbon a little longer than the curly ribbon. You want them to stick out further on your finished bows.
Cut a "V" on each end of these strips and seal by dabbing a little clear nail polish along the edges.
Next you can either glue the strips together with the hot glue gun or just place them in your preferred order.

Now cut two pieces of ribbon four times the length of the rest of your ribbon and glue them in a circle like this.

Glue these large circles onto your first layer of ribbon (or if you are sewing your bow, place them on top)

Lay each half of the circles flat and glue (skip this step if you are sewing)

It should look like this when you are finished gluing them down.

You can now add your curly ribbon and any other embellishments. (If you are sewing your bow, you would now stitch through the center of the bow and then wrap your string around the center a few times before tying in the back. Continue on with the next steps.)

Tie a knot into an extra piece of ribbon (be sure it is long enough to fit around the center of your bow and still tie in the back)


Now tie around the center of your bow.


Place a dot of glue on the back of your bow and then place on your clip (or whatever you have decided to use).

Fold one end of the ribbon you previously tied around your bow to the inside of your clip.

Next glue the other end down. Cut any excess if necessary.
As you can see I am using a non slip clip. I will later give a tutorial on how to make these.

There you have it, a beautiful Curly Bow! Its time to let your little girl wear this masterpiece ;)

No comments:
Post a Comment